How to use an audiogram to improve the sound quality of headphones

Each person's hearing is unique. Some hear better, and some not so well. Children hear much higher sounds than adults, and the older a person gets, the smaller the range of high sounds they can hear. On top of this, throughout life, our hearing can be affected by various factors, such as prolonged exposure to noise or very loud sounds.
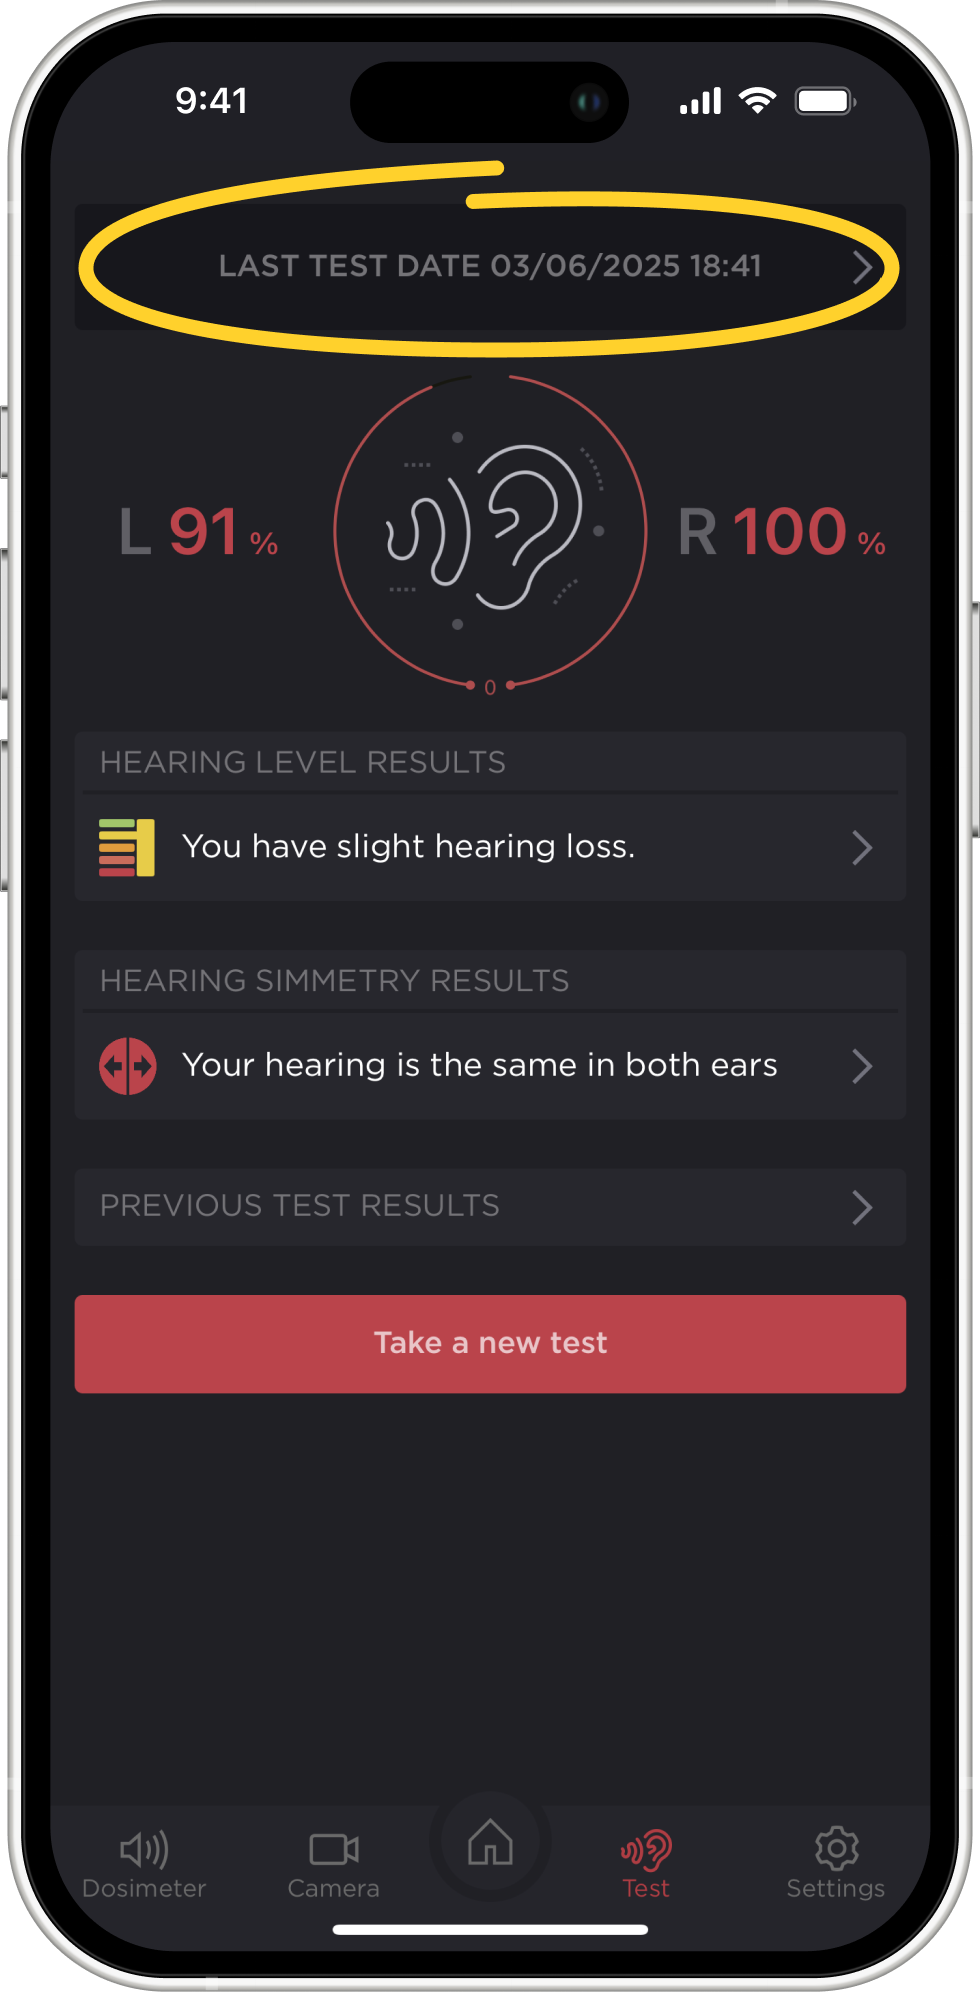
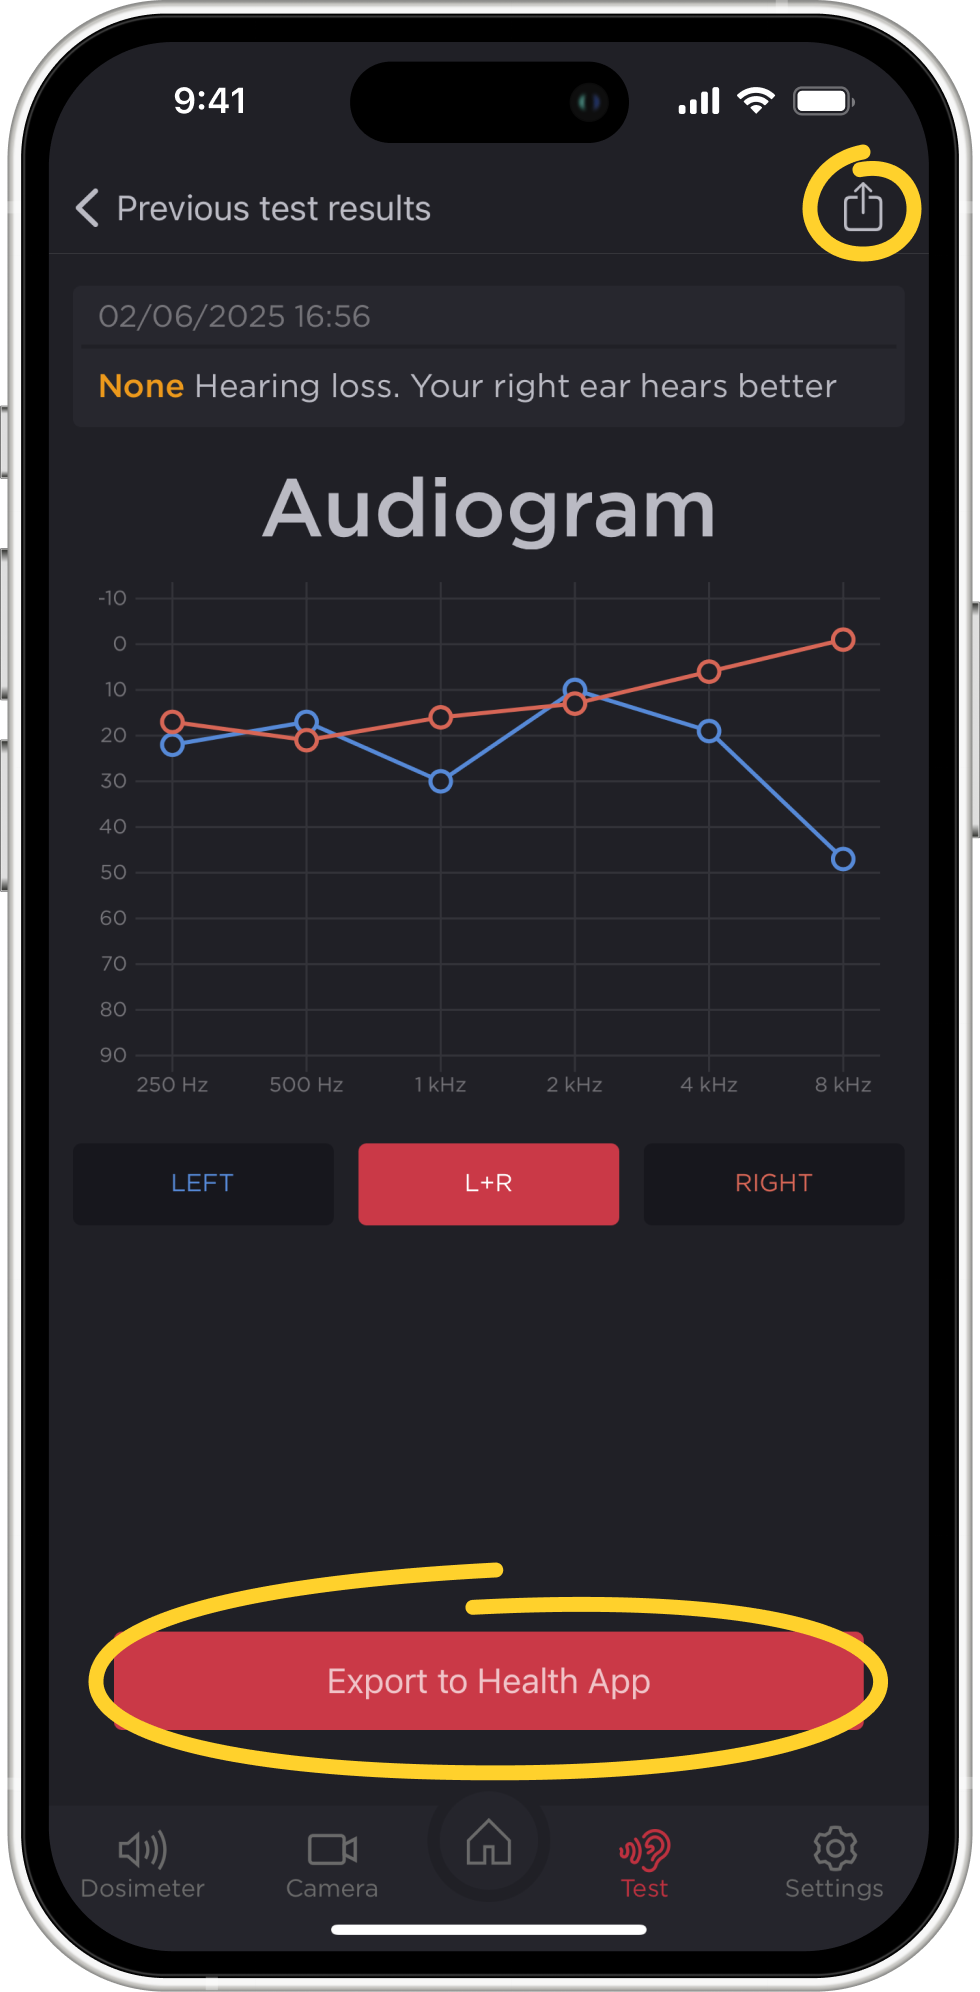
A hearing test can help you assess your hearing. The result of a hearing test is called an audiogram. The audiogram shows which frequencies of sounds you hear better or worse.
After taking a hearing test and getting an audiogram, you can configure your devices so that the frequencies that you don’t hear very well are correspondingly amplified, for example, when playing music. Thus, you can be sure that you hear the music as accurately as possible. By setting up your headphones based on the results of your audiogram, the sounds will be configured to match the unique characteristics of your hearing, ensuring the most accurate reproduction of sound material.
Here’s a detailed step-by-step guide to improving the sound quality of compatible headphones with the help of an audiogram:
1. Take the hearing test. You can do this anywhere by scheduling an appointment with an audiologist or using a special app. You will need to visit a doctor for a medically accurate audiogram. However, for everyday needs not related to health, you can easily use an app like Decibel Pro.
In this separate article, you can find a detailed guide for taking the hearing test using the Decibel Pro app. The next steps listed below are provided under the assumption that you have passed the hearing test and received your audiogram.
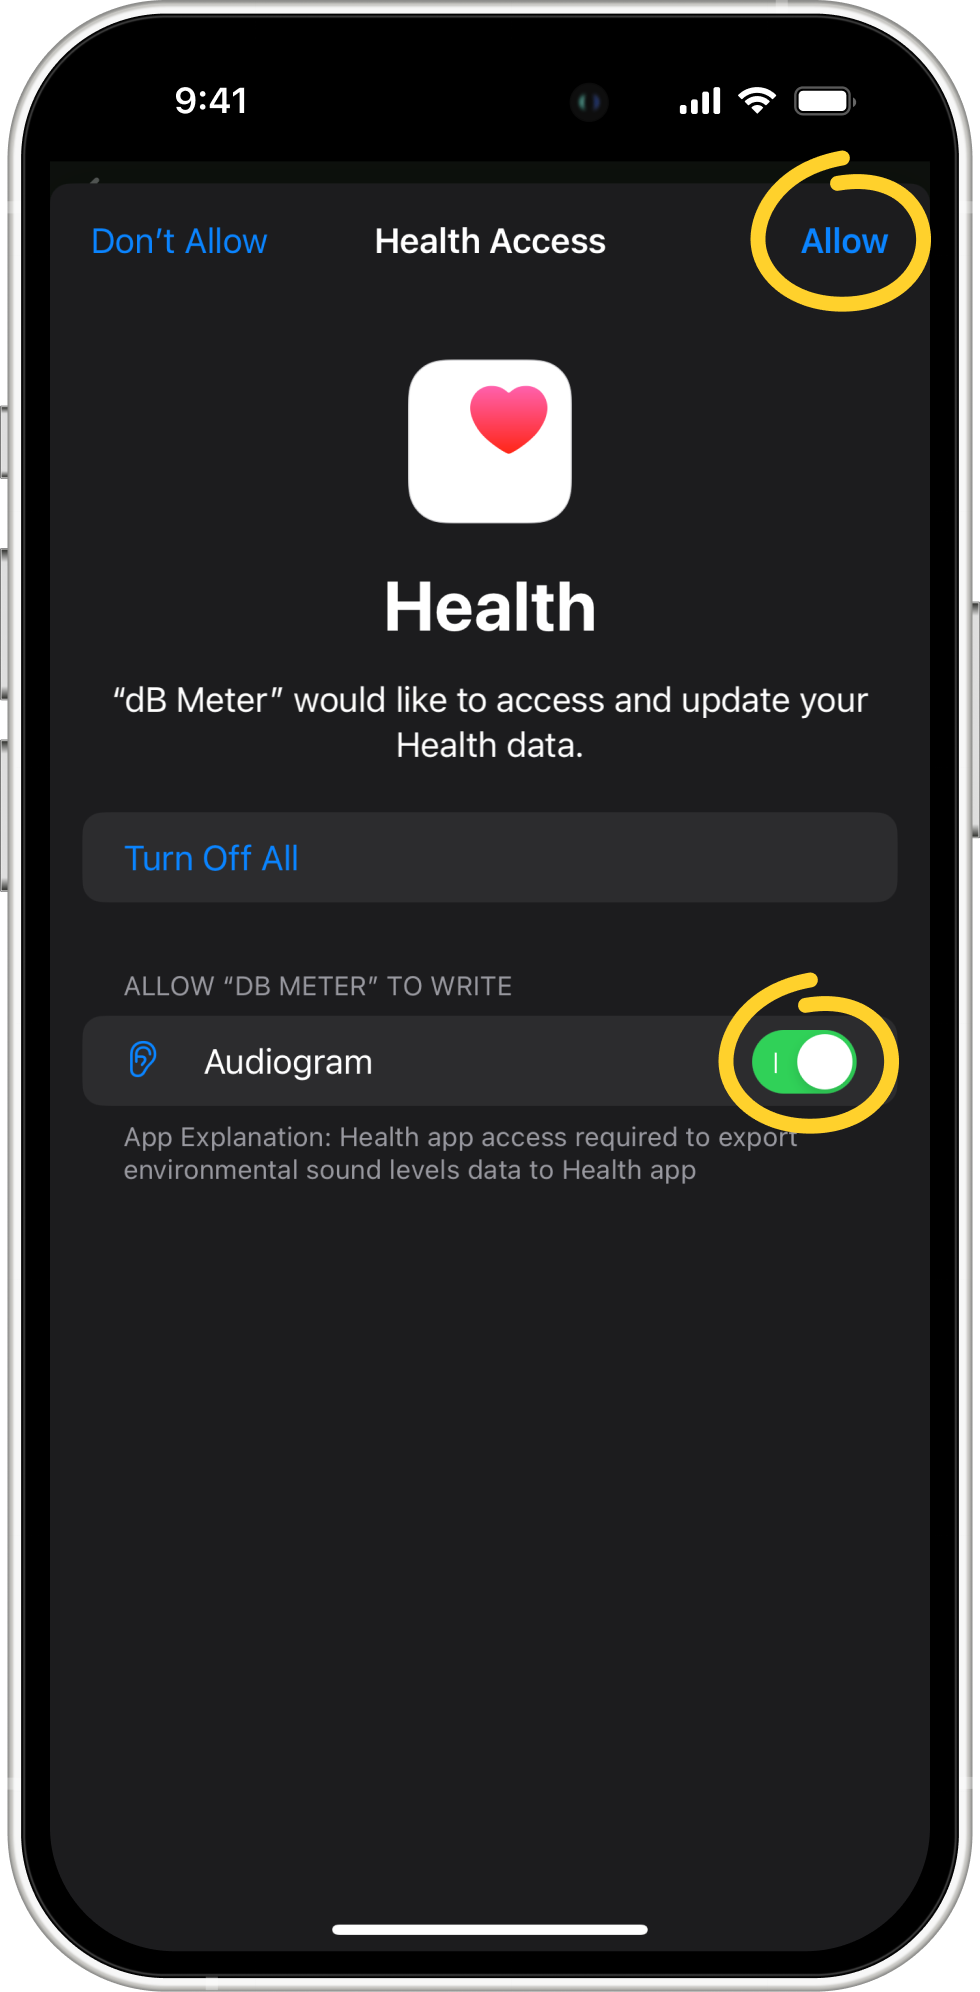
2. Export the audiogram to the Health app as shown in the screenshots below.
3. After taking the hearing test and exporting its result (the audiogram to the Health app), the next step is adjusting the audio playback to match the characteristics of your hearing. This is very easy to do.
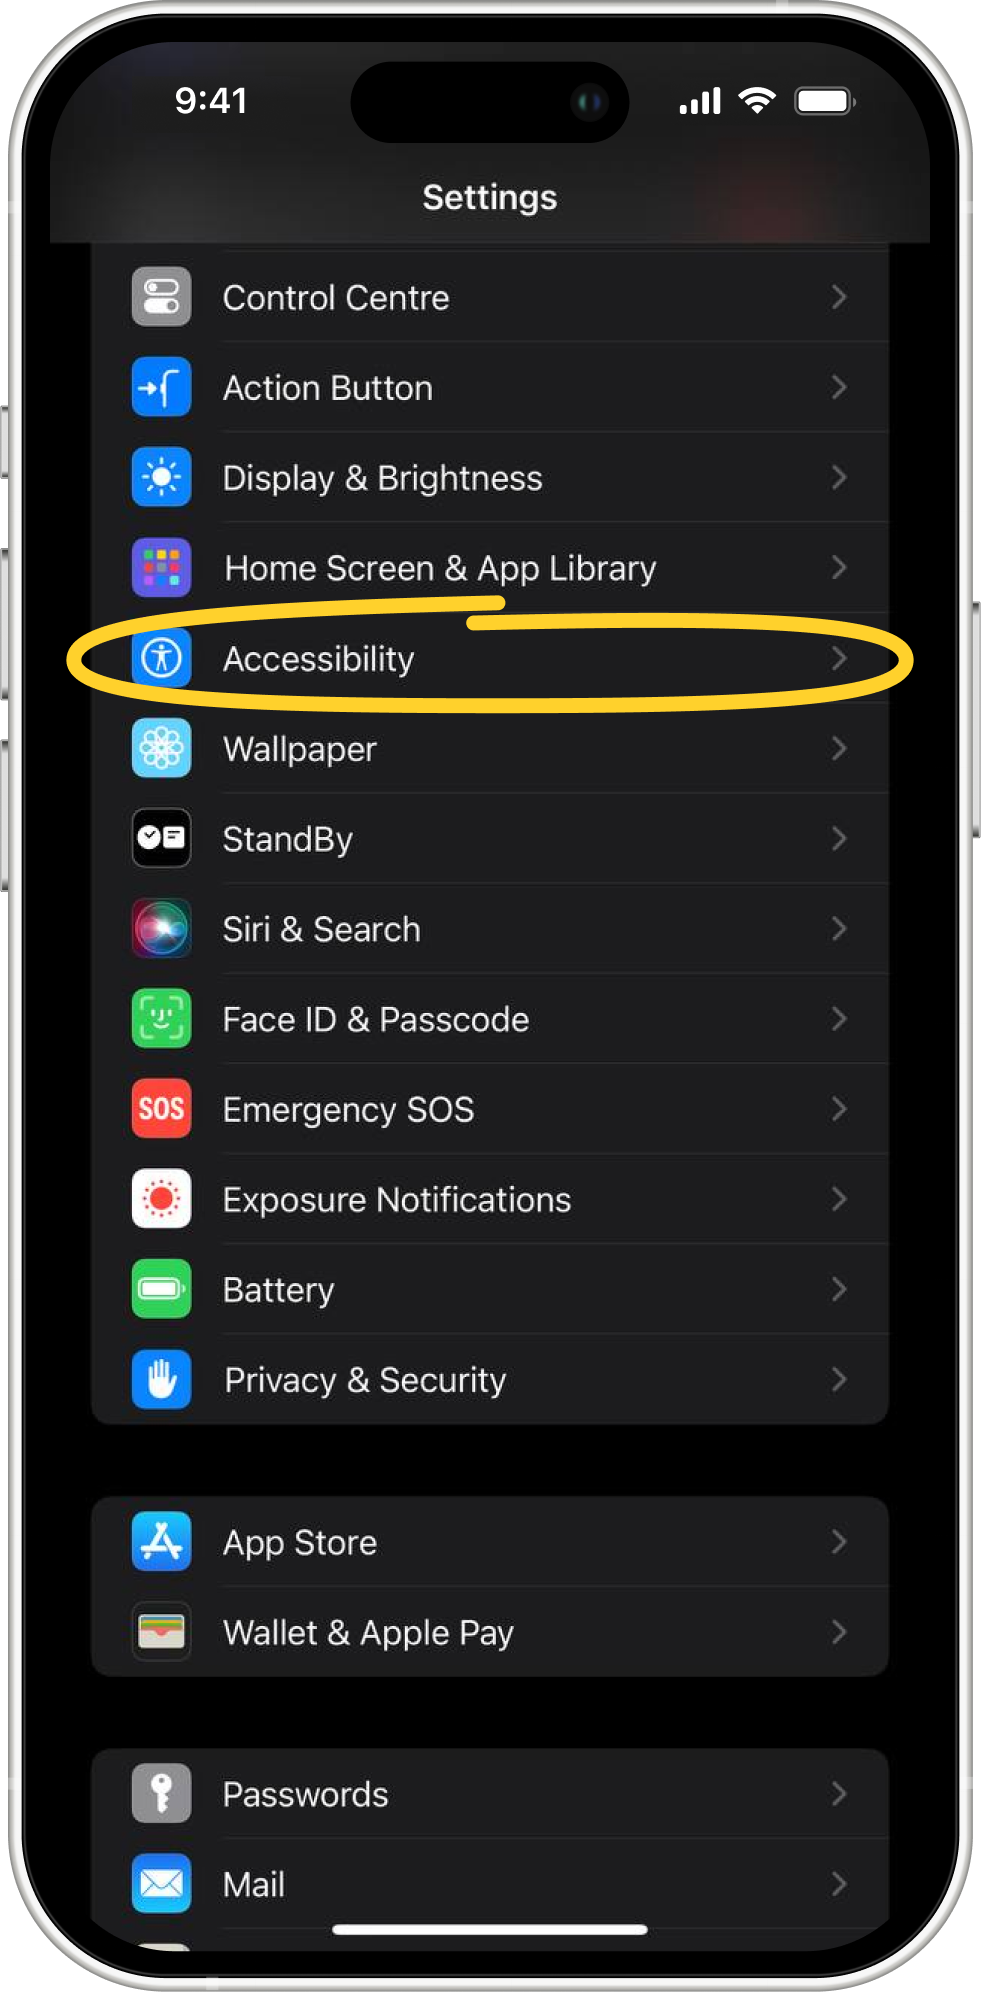
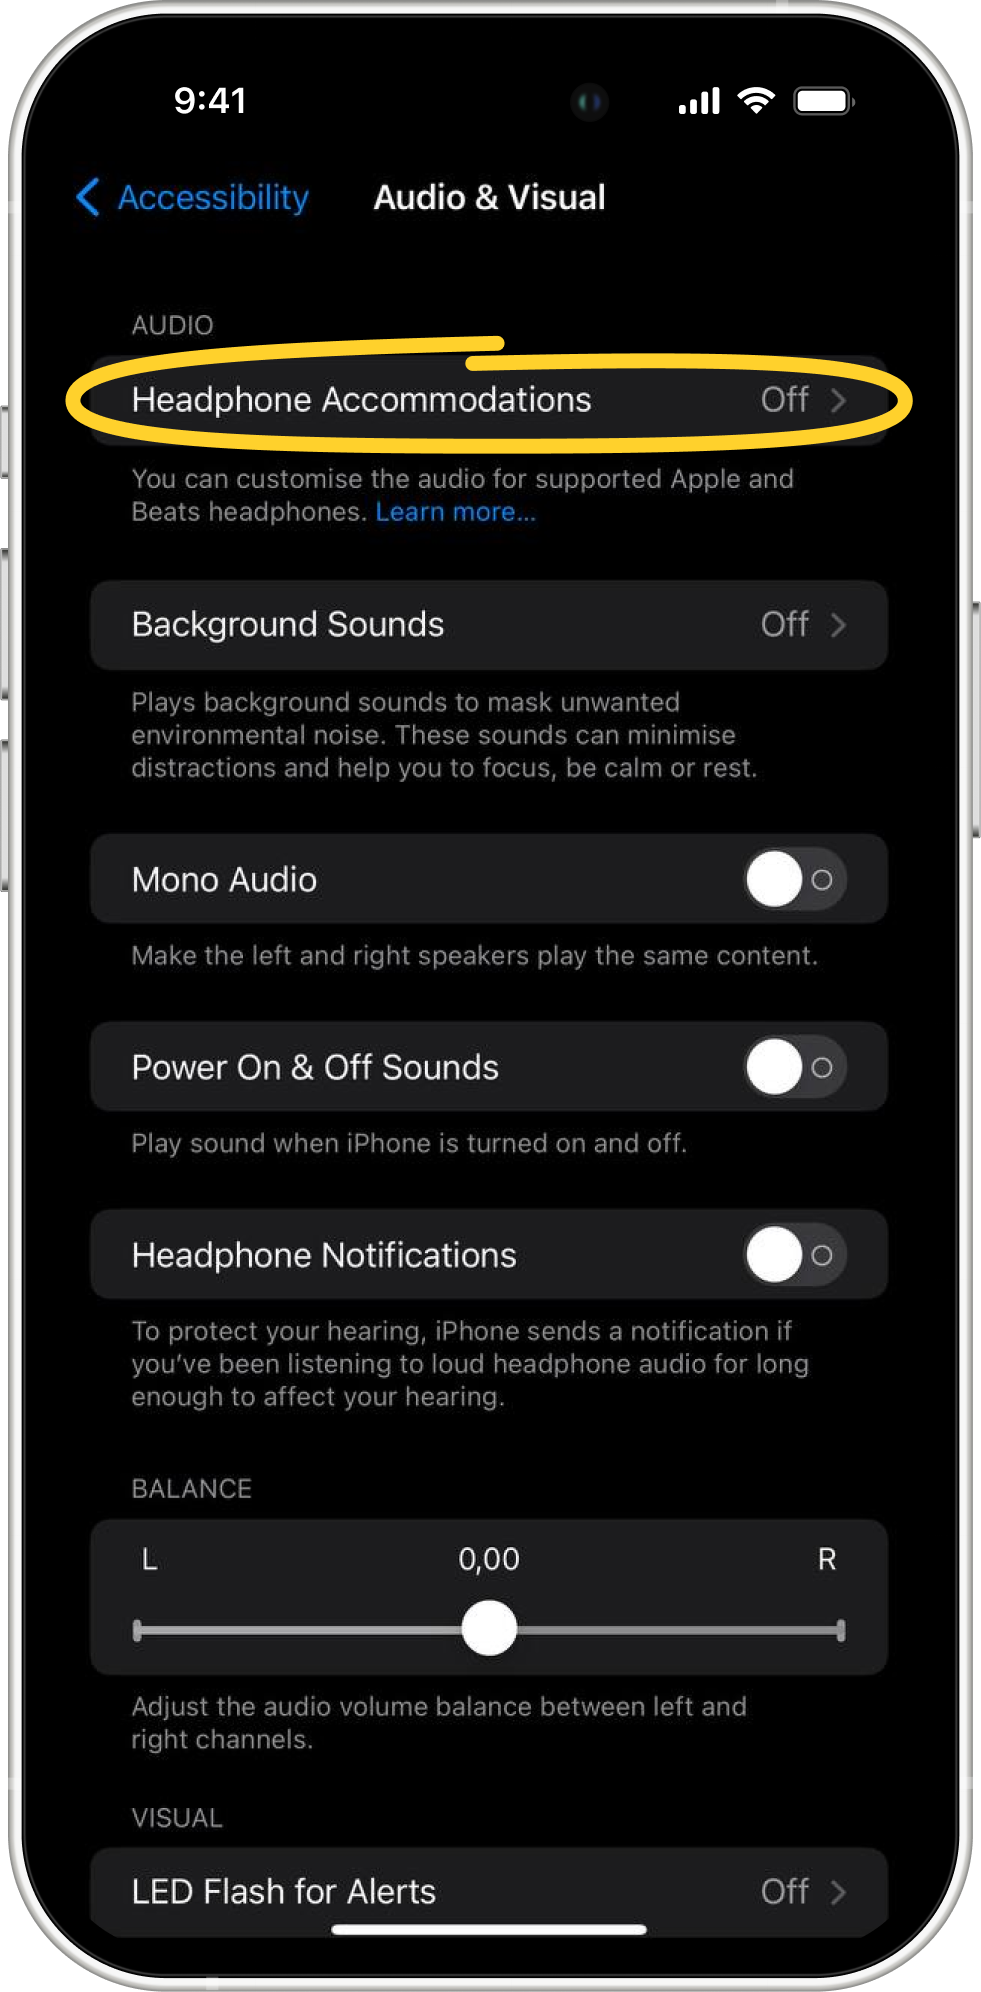
4. Open your device’s Settings and go to Accessibility - Audio & Visual.

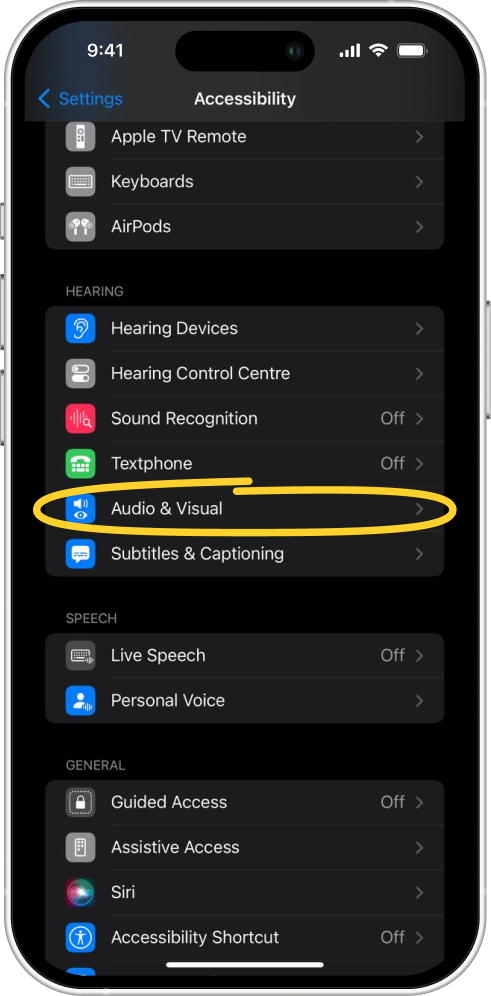
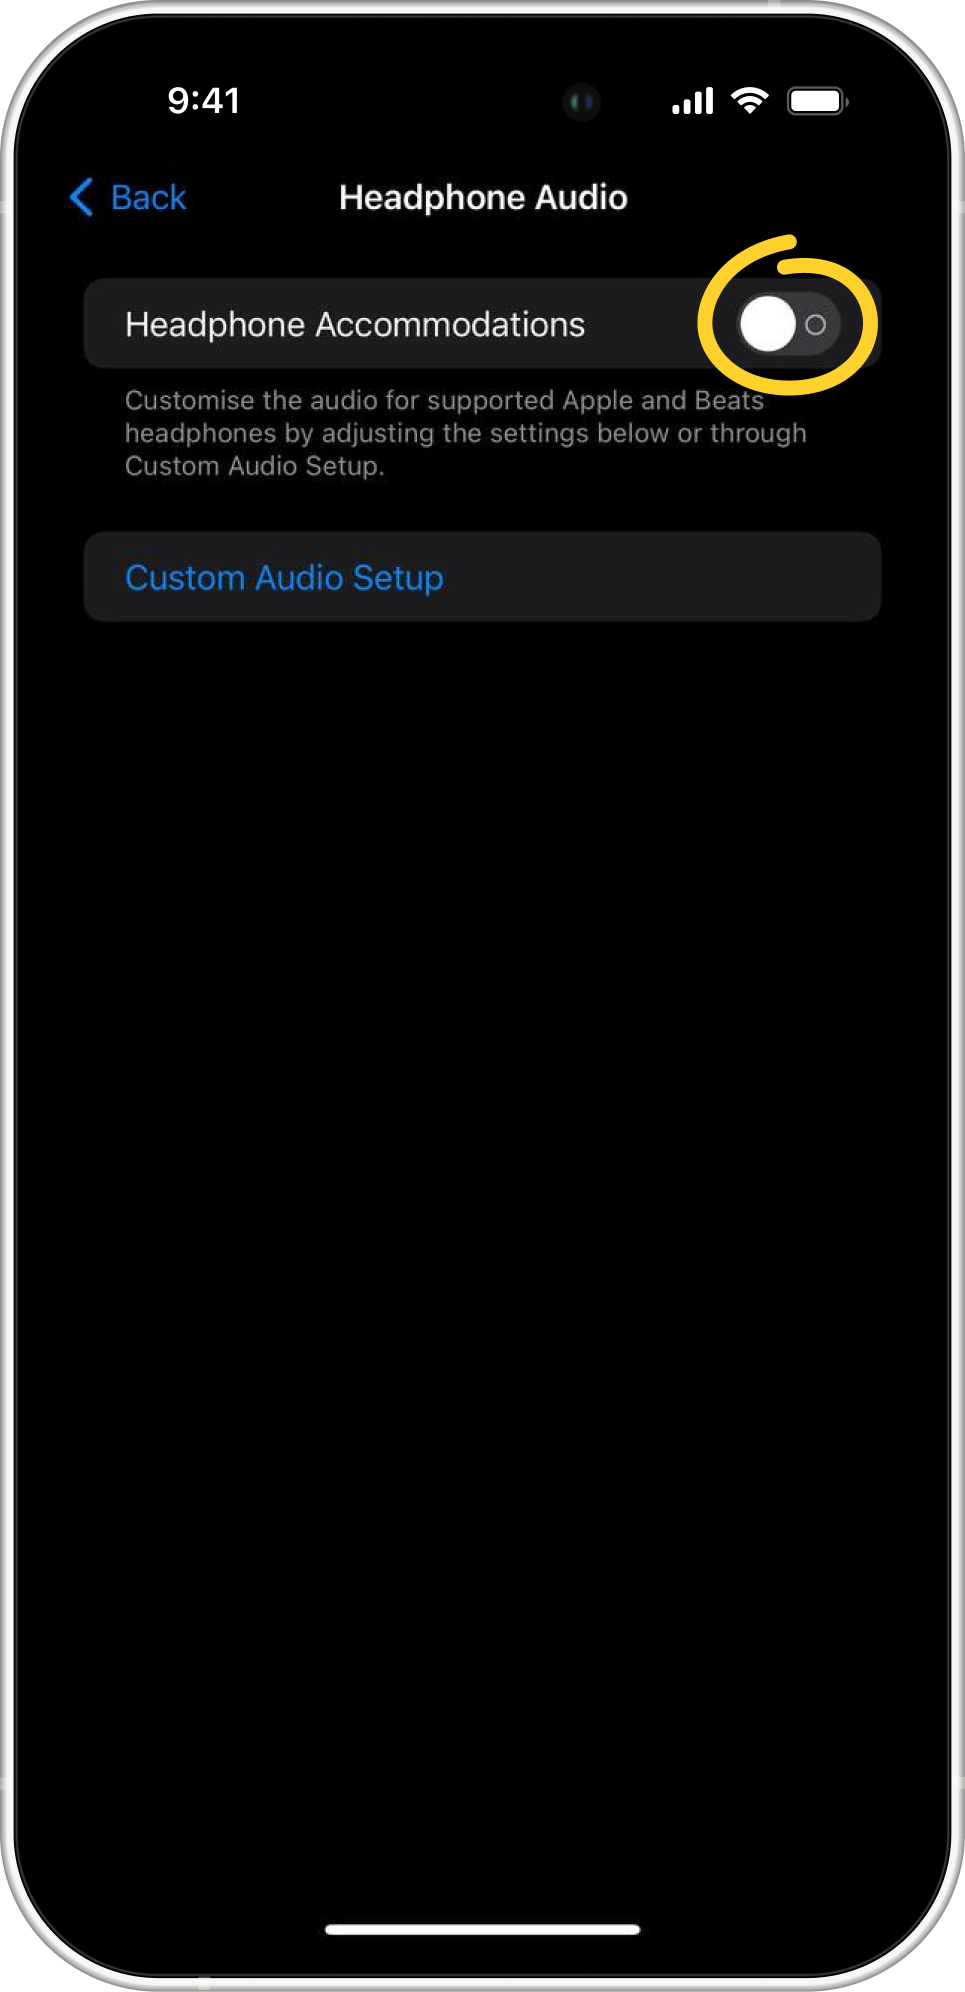
5. Tap on Headphone Accommodations and switch the slide to On.

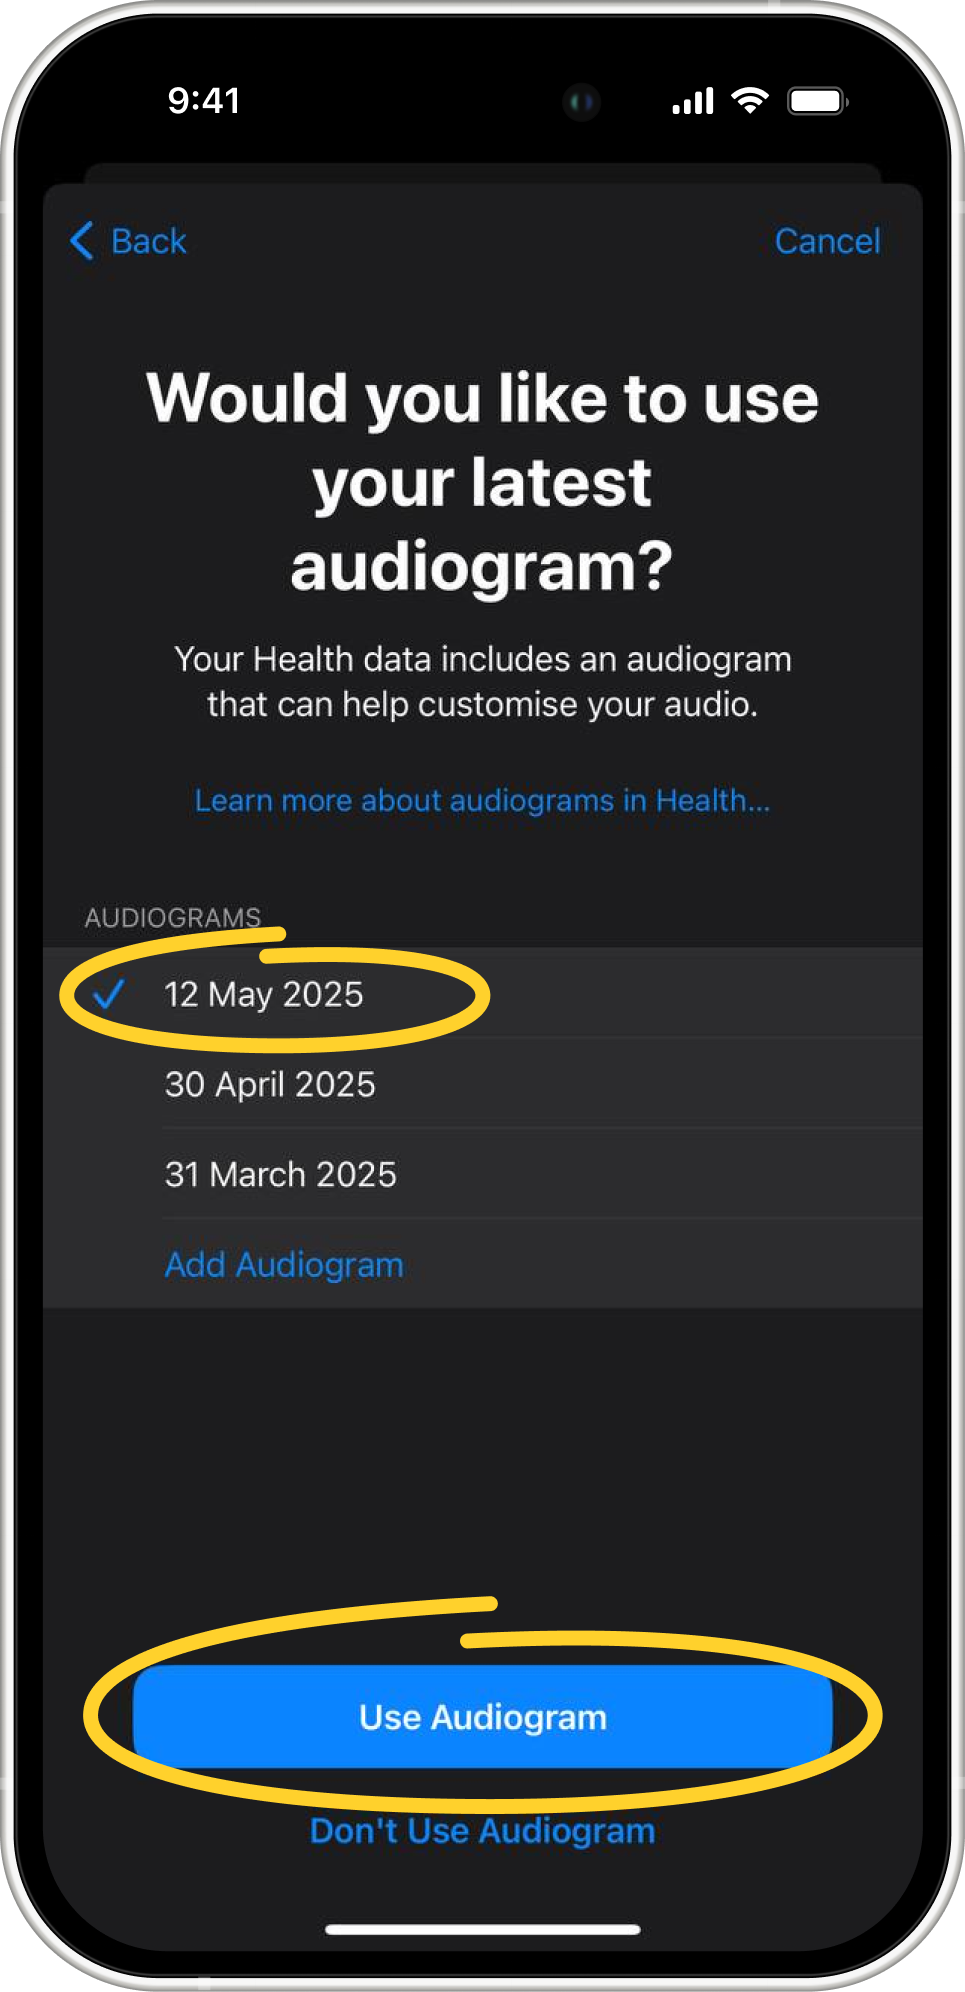
6. At this point, if you have previously exported your audiogram (if not, please read this article on how to do so), the audiogram option will be selected automatically. Alternatively, you can choose this option manually.
7. Once you select the audiogram option, your supported headphones will be tuned with your audiogram data, and all the sounds you'll hear from your headphones from this point on will be processed in accordance with your audiogram. This will help you hear some sounds better and more accurate, just as they were created by your favorite artist.
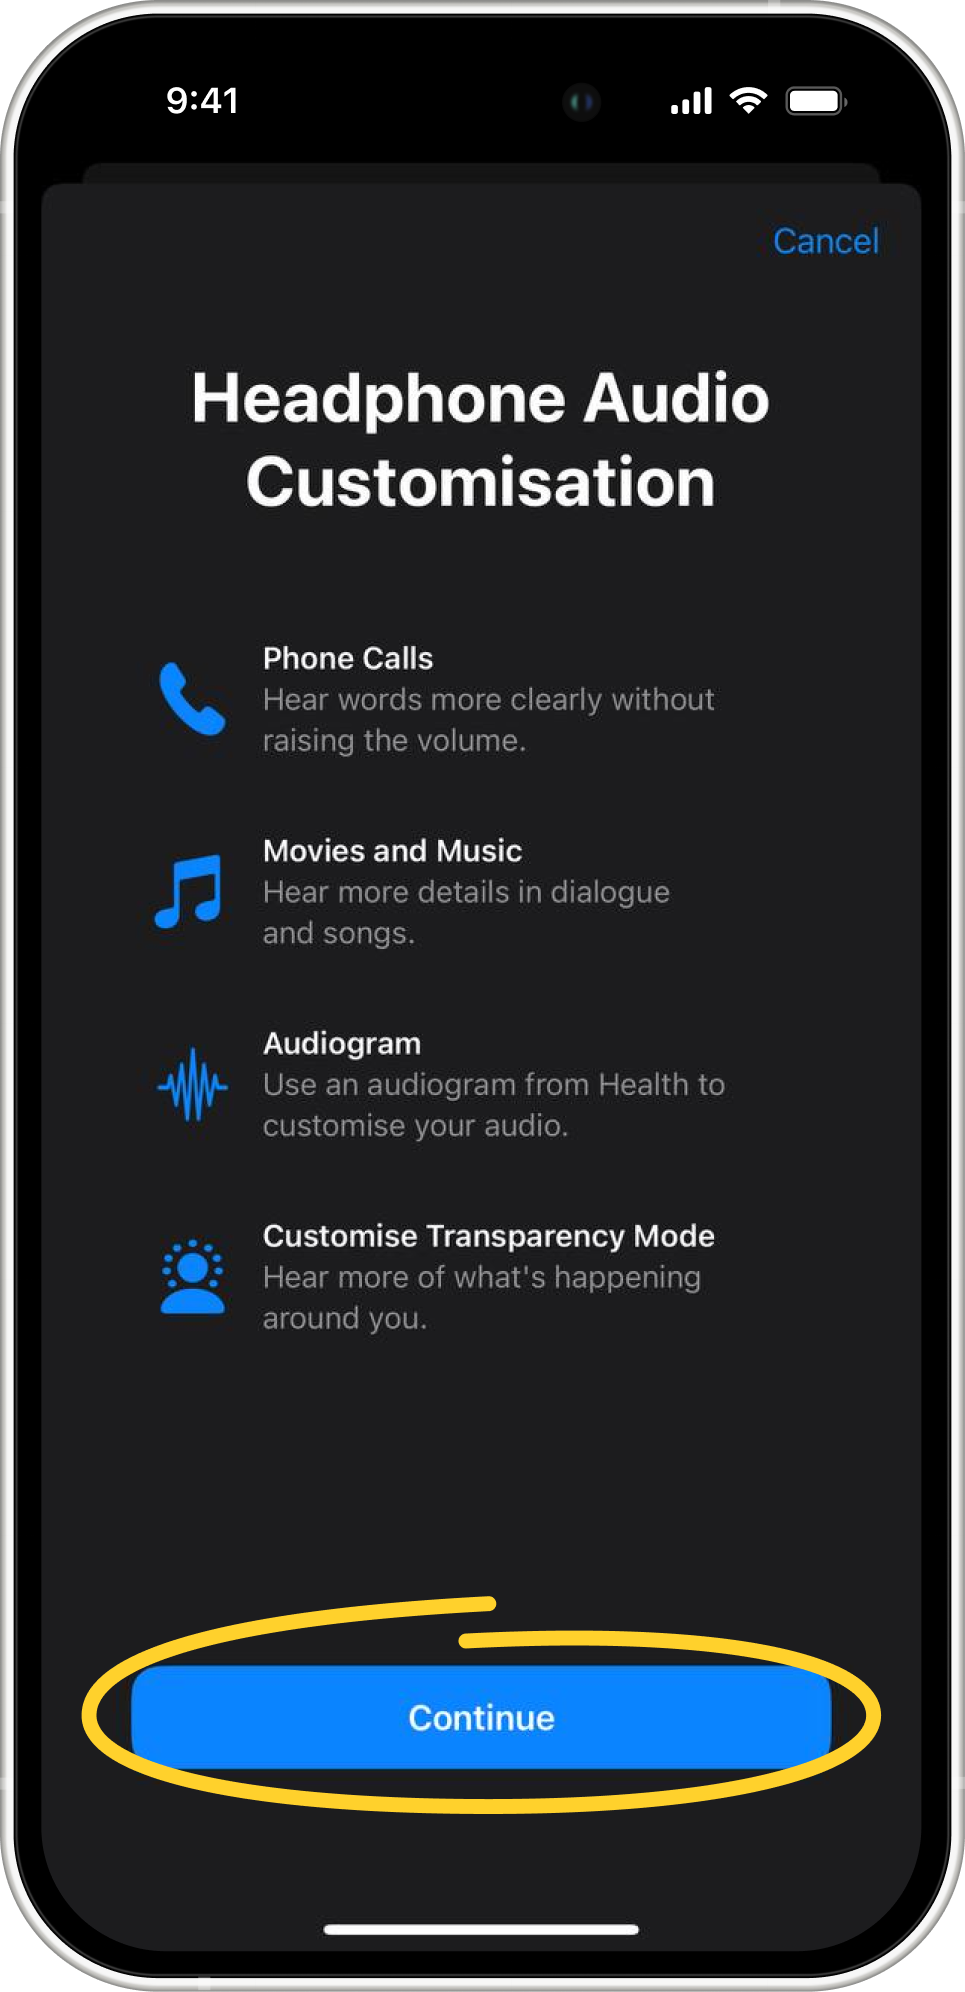
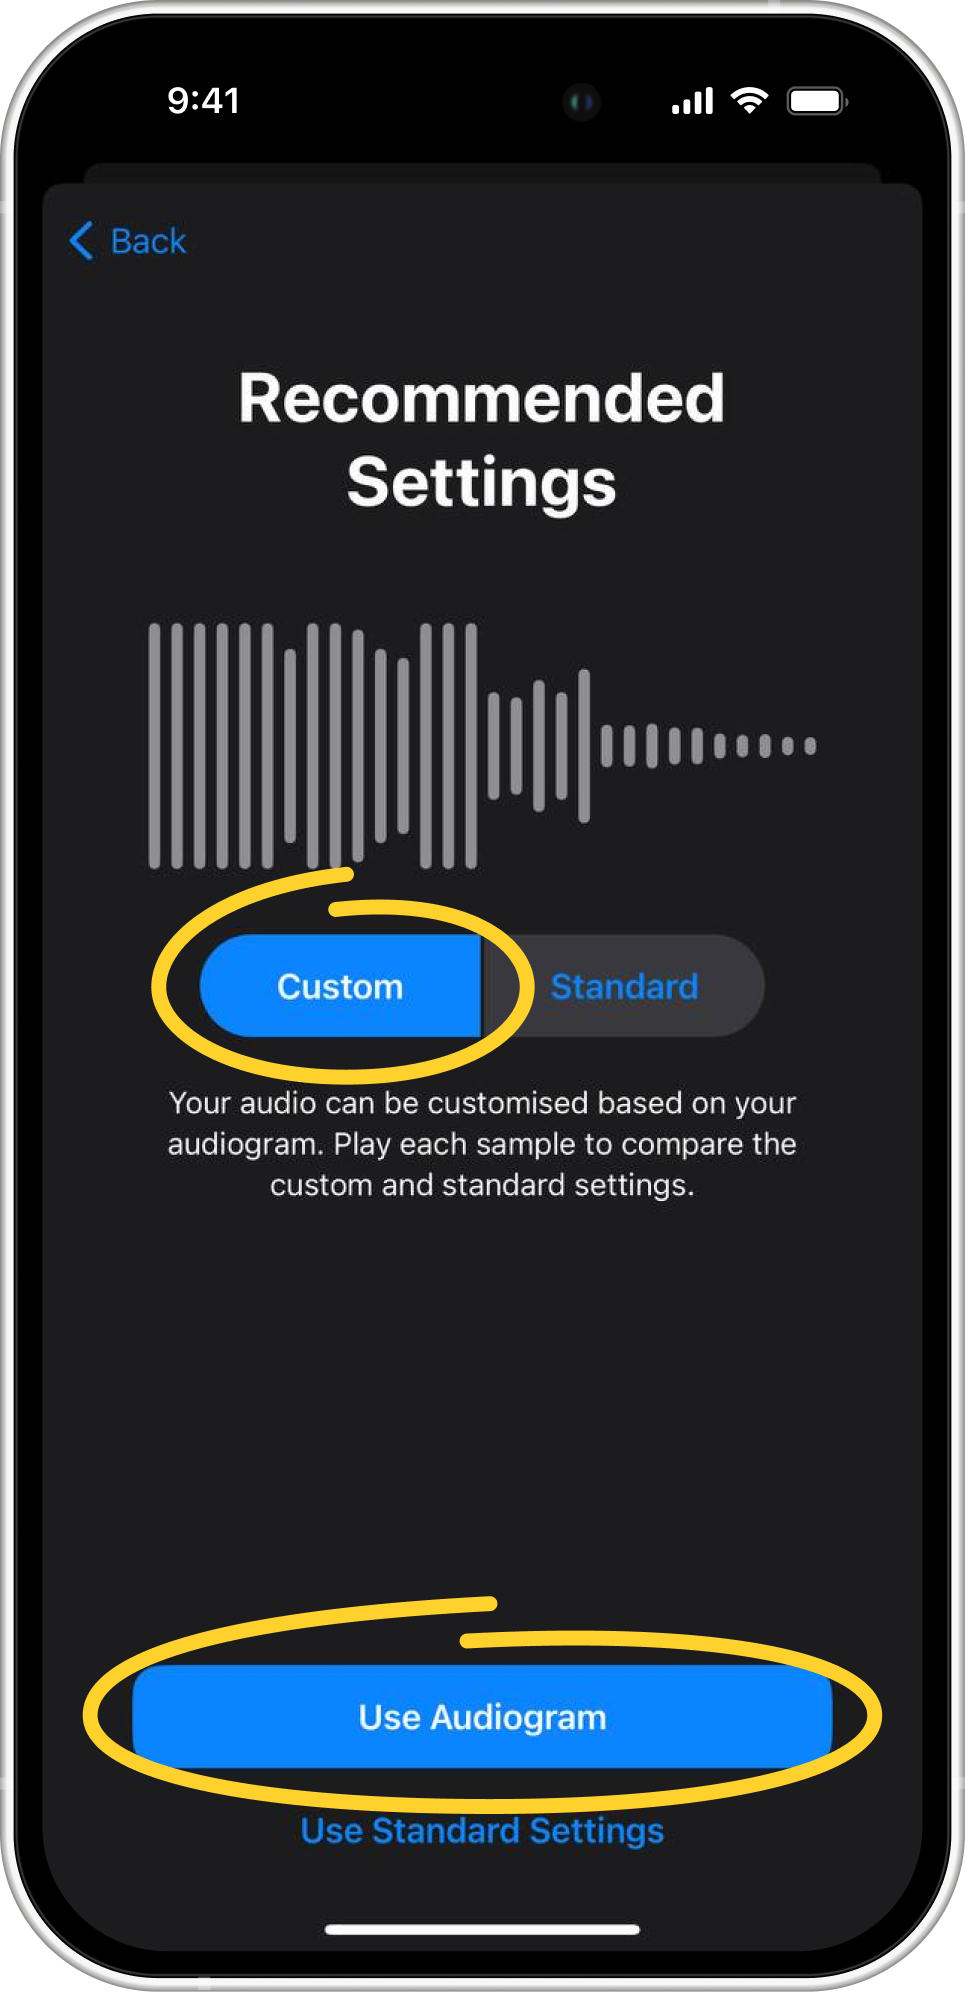
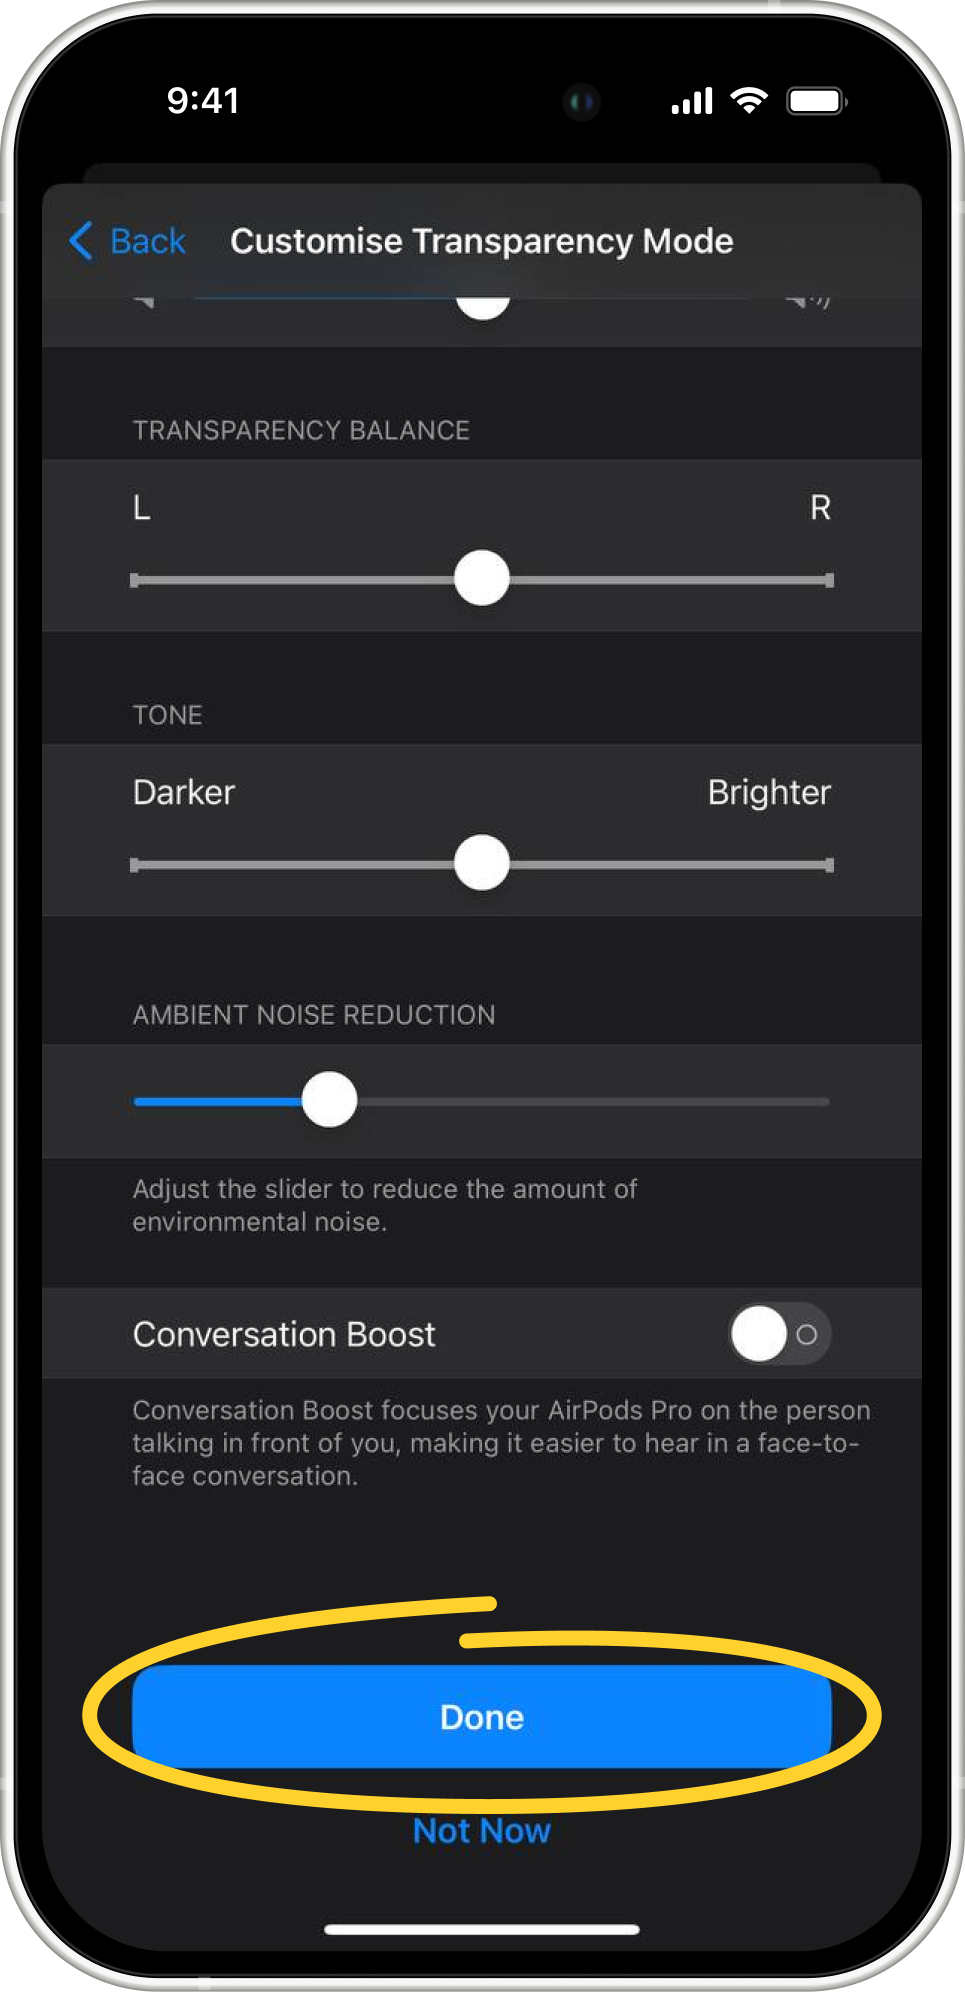
8. You can also choose to create an audio custom setup if you tap on the Custom Audio Setup option. This option allows you to select one of your available audiograms, compare the sound, and fine-tune compatible headphones. Please see the list of compatible headphones below.
9. If you'd like to disable this feature, simply switch Headphone Accommodations off.
List of compatible headphones:
- AirPods 2, 3, and 4 (both models)
- AirPods Max
- AirPods Pro 1 and 2
- Apple EarPods (with 3.5 mm Headphone Plug or Lightning Connector)
- Beats Fit Pro
- Beats Solo Pro
- Powerbeats
- Powerbeats Pro
- Powerbeats Pro 2